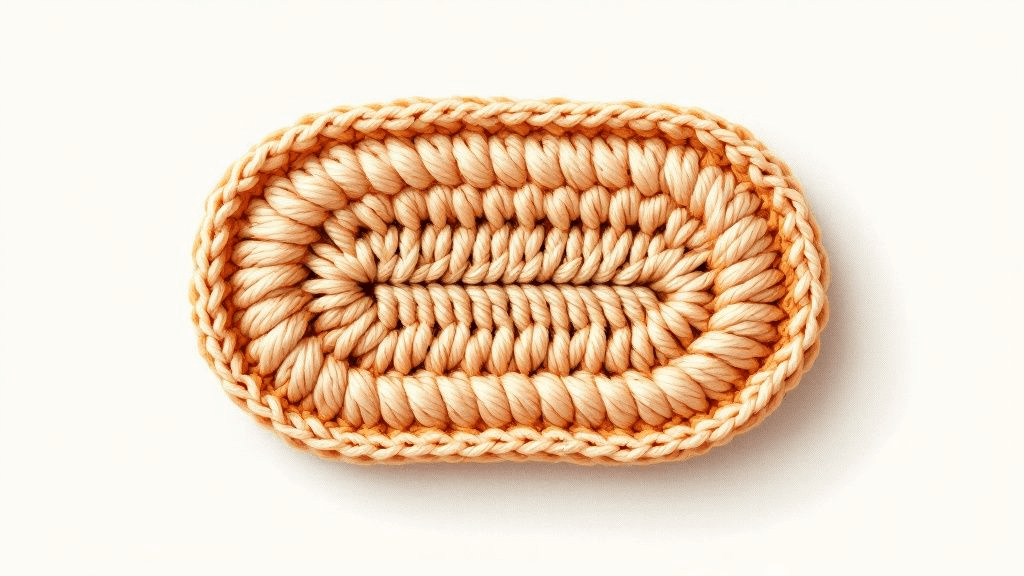
To crochet an oval, make a foundation chain, work single crochet along one side of it, put several stitches into the last chain to turn the corner, then work along the other side of the chain and finish with extra stitches at the starting end. In later rounds you add stitches only at the two curved ends, so the straight sides stay straight.
Where ovals are used in amigurumi
A magic ring grows outward equally in every direction, so it makes circles and balls. Many toy parts are longer than they are wide, and starting them around a chain gives that length from the first round.
- Feet and soles, especially for toys meant to stand.
- Snouts and muzzles that stick out from the face.
- Beaks and bills, often worked as a small flattened oval.
- Long bodies for animals that lie down.
- Bases for baskets, shoes and doll footwear.
The length of the starting chain sets the length of the straight middle part, and the number of rounds sets the width.
Before you start
You need a smooth yarn in a light color so you can see the chain clearly, a hook that gives a tight fabric, and at least one stitch marker. A locking marker is ideal because you will move it around the curves.
It also helps to know the two sides of a chain. The top side shows a row of small V shapes. The underside shows a single bump running down the middle, sometimes called the back bump. When you work around a chain, you crochet into one side going up and the other side coming back.
Round 1, step by step
This example uses a chain of 6, which is a common start for small feet.
- Chain 7. The extra chain is skipped and acts as a turning chain.
- Work into the second chain from the hook. Make 1 single crochet there, then 1 single crochet in each of the next 4 chains. You have 5 stitches along the first side.
- Turn the first curve. Work 3 single crochet into the last chain. These stitches fan around the end.
- Rotate your work so the underside of the chain faces up.
- Work along the second side. Make 1 single crochet in each of the next 4 chains, working into the remaining loops of the chain.
- Turn the second curve. Work 2 single crochet into the last chain, which is the first chain you worked into. Together with the first stitch of the round, that gives 3 stitches at this end too.
Round 1 has 14 stitches: 5 + 3 + 4 + 2. Place your marker in the first stitch and continue in a spiral, as most amigurumi patterns do. If the spiral is new to you, our guide to spiral and joined rounds explains the difference.
Different patterns count the ends slightly differently, and some begin with a longer or shorter chain. Always follow the stitch totals your pattern gives; the method is the same.
Growing the oval
After round 1, the straight sides get one stitch per chain stitch, and all the shaping happens at the two ends. The ends are effectively half circles, so they need extra stitches each round just like a flat circle does.
| Round | Straight side 1 | First end | Straight side 2 | Second end | Total |
|---|---|---|---|---|---|
| 1 | 5 sc | 3 sc in last ch | 4 sc | 2 sc in first ch | 14 |
| 2 | 4 sc | inc x 3 | 4 sc | inc x 3 | 20 |
| 3 | 4 sc | (sc, inc) x 3 | 4 sc | (sc, inc) x 3 | 26 |
In this layout the round is counted as 4 straight stitches and 3 end stitches on each side; exact counts in a pattern depend on where the round starts and how your pattern counts the end stitches. The rule is that each round adds about the same number of increases at each end, with plain stitches between them growing by one each round, just as in a circle. To see why that works, our guide to increasing and decreasing explains the round math.
Two styles of oval
Crochet tutorials describe two common ways to place the end increases, and both appear in patterns.
- Increases spread across the end. Several increases fan around the curve. This gives a smoothly rounded end, good for feet and bodies.
- Increases only at the corners. Two increases at each end, placed where the straight side meets the curve. This keeps the ends flatter and slightly squarer, which suits soles and shoe bases.
If your oval looks too pointed or too boxy at the ends, compare it with your pattern; the designer may be using the other style.
Keeping both ends the same
The two ends of an oval often come out uneven, because the first end is worked into the top of the chain and the second into the underside. These habits help:
- Mark the center stitch of each end with a marker during the first rounds.
- Count the stitches between markers on each side at the end of every round.
- Pull the starting tail gently after round 1 to tighten the second end.
- Keep your tension steady around the curves, where it often loosens.
Turning the oval into a 3D part
Most ovals do not stay flat. A foot usually becomes three-dimensional with a round worked in the back loop only, which turns the edge upward and creates the walls of the foot. Then you work even rounds and decreases to close the top, often decreasing more at the front so the toe is rounded. A standing toy benefits from this flat, well-defined sole; our guide on making amigurumi stand up shows how to use it.
For snouts and beaks, you may work only a few rounds, leave the piece open and stuff it lightly before sewing it on.
Common problems
| Problem | Likely cause | Fix |
|---|---|---|
| Oval curls into a cup | Too few increases at the ends | Recount the ends and add the missing increases |
| Ends ruffle | Too many increases | Remove one increase per end |
| One end bigger than the other | Different tension on the chain's underside | Keep tension even and check counts per side |
| Chain twisted | Chain flipped while working the second side | Rotate the work, do not twist the chain |
| Hard to see the second side | Dark or fuzzy yarn | Practice in a smooth light yarn first |
Practice one or two flat ovals before a project and you will recognize the method at once in a pattern. When you meet a chain-started foot or muzzle in one of our amigurumi PDF patterns, count each side of the chain separately and you will keep your place.







